Recent Recipes
Week 20 - The Cookbook Challenge: Chocolate Mayonnaise Cake
Comments (24) | Friday, April 2, 2010


*NB. I did use whole egg mayonnaise, not cheap or tangy mayo you'd put in your salad roll.
Chocolate Mayonnaise Cake
Valli Little


Read More......
Orange & Coconut Cake
Comments (2) | Thursday, April 16, 2009
More Easter baking! This cake is so incredibly easy to make, you could make it anytime of year, just leave off the Easter eggs.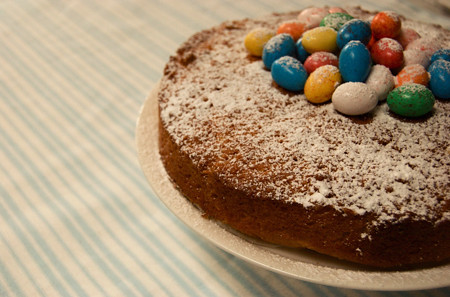 It is such a moist cake. I like the idea of using orange juice instead of milk, maybe that has something to do with why it was so moist.
Orange & Coconut Cake
Kate Murdoch
1 cup caster sugar
125g unsalted butter, softened
3 teaspoons finely grated orange rind
4 eggs
1 cup (160g) self-raising flour, sifted
1 3/4 cups (150g) desiccated coconut
2 tablespoons freshly squeezed orange juice
Easter eggs and icing sugar, to serve
1. Preheat oven to 160°C. Place sugar, butter and orange rind in a large bowl, and beat with electric beaters for 4 minutes until light and creamy. Add eggs, one at a time, beating well between additions.
2. Fold flour and coconut through mixture, along with orange juice. Spoon mixture into a 22cm-round cake pan greased and lined with baking paper. Cook for 50 minutes or until cooked through when tested with a skewer.
3. Allow to cool, then decorate with Easter eggs and a dusting of icing sugar.
Read More......
Chocolate-Orange Marble Cake
Comments (3) | Wednesday, April 15, 2009
I wanted to make dessert for Easter Sunday lunch with the family. Being Easter it had to involve chocolate didn't it? I tried the chocolate orange marble cake from the latest Donna Hay magazine. I then spruced it up with some little Easter eggs and a very cute little chicken.
I didn't do the marble effect very well on this one, it looks more like a top deck cake than anything but it was fantastic. Chocolate and orange is always a good combination and this didn't disappoint. The chocolate fudge sauce is definitely a must when doing this cake, so don't leave it out! I just need to get some fancy Bundt tins....hmmm my birthday is coming up *wink wink*!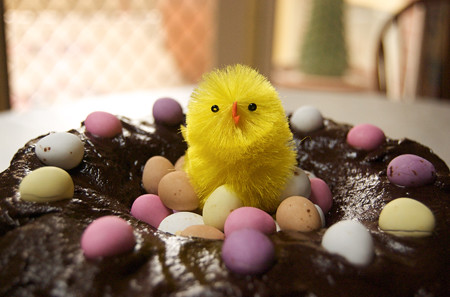
Chocolate-Orange Marble Cake
Donna Hay
1 1/3 cups (330ml) milk
2 cups (440g) caster sugar
1 teaspoon vanilla extract
250g butter, melted
1 1/2 cups (225g) plain flour, sifted
1/4 cup (40g) self-raising flour, sifted
2 eggs
1/4 cup (20g) cocoa, sifted
150g dark chocolate, melted
1 tablespoon finely grated orange rind
1-2 drops orange food colouring
chocolate fudge sauce
1/3 cup (80ml) single (pouring) cream
200g dark chocolate, chopped
1. Preheat oven to 160ºC (320ºF). Place the milk, sugar and vanilla in a bowl and whisk to combine. Add butter and whisk to combine.
2. Add flours and eggs and whisk until smooth.
3. Divide mixture into 2 bowls. Add the cocoa and chocolate to one and whilst until smooth. Add the orange rind and food colouring to the other and whisk until smooth.
4. Pour chocolate mixture into a well greased 8 cup-capacity (2 litre) Bundt tin. Drop spoonfuls of the orange mixture onto the chocolate and gently swirl with a butter knife to create a marble effect.
5. Bake for 1 hour 10 minutes or until cooked when tested with a skewer. Cool in tin for 10 minutes. Turn onto a wire rack t cool completely.
6. To make the chocolate fudge sauce, place the cream and chocolate in a saucepan over a low heat and cook, stirring, until melted and smooth. Pour over the cake to serve.
Serves 8-10.
 Voila! Bon Appétit!
Read More......
Hot Cross Truffles
Comments (2) | Monday, April 13, 2009
Well Easter is pretty much over! Hope you all had a great long weekend and seriously over indulged like I did. I think I ate more than what I would at Christmas. Well definitely more chocolate that's for sure.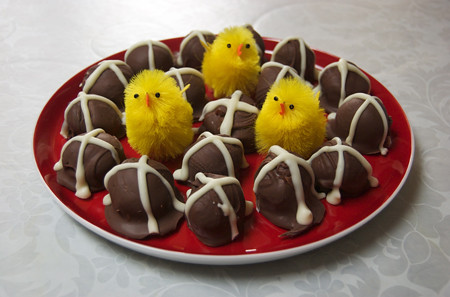 My hot cross buns got lots of attention, and well why not make hot cross truffles that taste just as good?
They contain mixed fruit and the same spices as I used in my hot cross buns, but coated in lashing of chocolate and cream... yum! They are deliciously creamy on the inside, and the mixed fruit makes these little yummies a little bit healthy! haha!
Hot Cross Truffles
Gemma Purcell
200g milk chocolate, coarsely chopped
80ml (1/3 cup) thickened cream
60g (1/3 cup) dried mixed fruit
1/2 tsp ground mixed spice
1/4 tsp ground cinnamon
1 x 375g pkt milk chocolate melts
150g white chocolate melts
1. Place milk chocolate and cream in a heatproof bowl over a medium saucepan half-filled with simmering water (make sure the bowl doesn't touch the water). Use a metal spoon to stir until chocolate melts and the mixture is smooth.
2. Remove any whole cherries from the mixed fruit. Add the mixed fruit, mixed spice and cinnamon to chocolate mixture and stir to combine. Cover and place in the fridge for 3 hours or until firm.
3. Line a baking tray with non-stick baking paper. Use your hands to roll tablespoonfuls of mixture into balls. Place on the lined tray. Place in the fridge for 30 minutes or until firm.
4. Place the milk chocolate melts in a heatproof bowl over a saucepan of simmering water (make sure the bowl doesn't touch the water). Use a metal spoon to stir until chocolate melts and is smooth. Use a truffle dipper or a fork to dip 1 truffle into the melted chocolate to evenly coat. Remove truffle, tapping the dipper handle gently on the edge of the bowl to shake off excess chocolate. Place on the lined tray. Set aside for 10 minutes to set.
5. Place white chocolate melts in a heatproof bowl over a saucepan of simmering water (make sure the bowl doesn't touch the water). Use a metal spoon to stir until chocolate melts and is smooth. Transfer to a piping bag fitted with a 4mm plain nozzle. Pipe a cross on the top of each truffle. Set aside for 10 minutes to set.
 Voila! Bon Appétit!
Read More......
Hot Cross Buns
Comments (11) | Tuesday, April 7, 2009
My first batch of hot cross buns ever...and they were a success!
I was going to do Nigella Lawson's recipe, but hers looked all flat and lifeless. And every other recipe I read, looked like way too much work! I was pretty sure Donna Hay had a recipe and I'm glad she did. Like most of her recipes, this one was easy.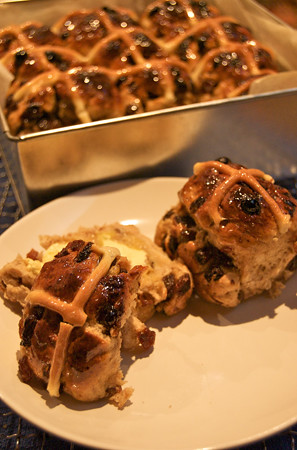 I felt that Donna Hay's recipe didn't include enough mixed fruit so I added in LOTS more. I have made alterations in the recipe to about 2.5 cups of mixed fruit, but you can add more or less depending on how fruity you like your buns.
I feared they were going to be as hard as rocks but they weren't. They were surprisingly soft and delicious! The spices were right, the flavour was there, and I'm so glad they were a success. I might try choc chip ones next time!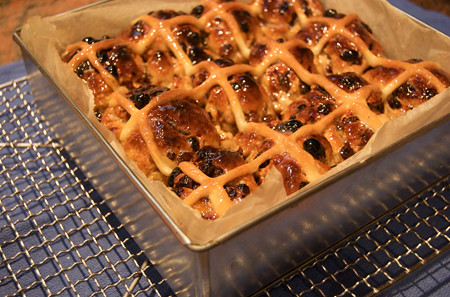
Hot Cross Buns
Donna Hay, alterations by Iron Chef Shellie
2 tablespoons dried yeast*
¼ cup (55g) caster (superfine) sugar
1½ cups (375ml) warm milk
4¼ cups (635g) plain (all-purpose) flour
2 teaspoons mixed spice
2 teaspoons ground cinnamon
50g butter, melted
1 egg
¼ cup (55g) caster (superfine) sugar, extra
2½ cups mixed fruit
Crosses
½ cup (75g) plain (all-purpose) flour
⅓ cup (80ml) water
Glaze
2 teaspoons sugar
1 teaspoon powdered gelatine
¼ cup (60ml) water
1. Combine the yeast, sugar and milk in a bowl. Set aside for 5-10 minutes or until bubbles form on the surface.
2. Combine the flour, mixed spice, cinnamon, butter, egg, extra sugar, sultanas, mixed peel and yeast mixture in a large bowl. Mix with a butter knife until a sticky dough forms. Knead on a lightly floured surface for 5–10 minutes or until it feels smooth and elastic when pressed. Place in an oiled bowl, cover with a tea towel and stand in a warm place for 30–40 minutes or until doubled in size.
3. Lightly knead the dough again, divide into 12 pieces and roll into balls. Place in a 23cm-square cake tin lined with non-stick baking paper. Cover with a clean tea towel and set aside in a warm place for 25–30 minutes or until doubled in size.
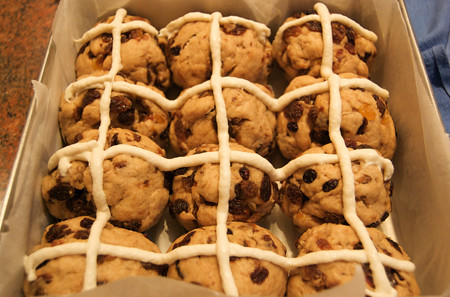 4. Preheat oven to 200ºC (390ºF). To make the crosses, combine the flour and water to make a smooth paste. Place in a piping bag** and pipe crosses onto the buns. Bake for 30–35 minutes or until well browned and springy to touch.
5. To make the glaze, combine the sugar, gelatine and water in a saucepan over medium heat and stir for 2 minutes or until dissolved. Brush warm buns with the glaze and serve with butter.
* You will need this amount of yeast because of the amount of sugar in the recipe.
** To make a piping bag, fill a ziplock bag with the cross mixture and snip off one corner.
Makes 12.
 Voila! Bon Appétit!
Read More......
Caramel Easter-Egg Muffins
Comments (2) | Saturday, April 4, 2009
It's that time of year again, my favorite, Easter! Chocolate to celebrate? I dunno who thought of that but I LOVE that idea!
I was going to give hot cross buns a go but my aunty dropped around a dozen and mum bought some so I thought I'd leave that idea for another day. I didn't buy enough caramel easter eggs, so 2 muffins were left with some random chocolate I found in the pantry.
These are good even if they aren't warm. They are best after baking as the chocolate is still all soft and gooey. A nice treat for your Easter breakfast!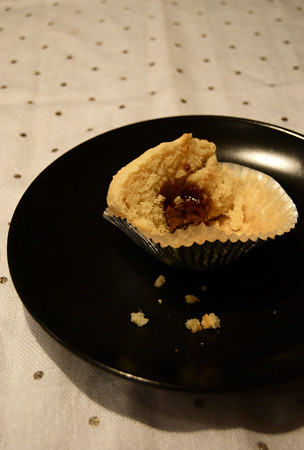
Caramel Easter-Egg Muffins
Taste.com.au
2 1/4 cups self-raising flour
2/3 cup caster sugar
125g butter, melted, cooled
3/4 cup milk
2 eggs
1 teaspoon vanilla essence
12 small caramel-filled Easter eggs*
1. Preheat oven to 180°C. Line a 12 x 1/3-cup capacity muffin pan with paper cases.
2. Sift flour into a large bowl. Stir in sugar. Whisk butter, milk, eggs and vanilla essence together.
3. Add butter mixture to dry ingredients. Use a wooden spoon to mix until just combined (don't over-mix or your muffins will be tough). Spoon batter into cases so each is one-third full. Place an unwrapped Easter egg into the middle of each muffin. Spoon over remaining muffin batter. 4. Bake muffins for 18 to 20 minutes, or until light golden and cooked through. Stand in pan for 10 minutes before turning onto a wire rack to cool completely.
Hint: Make sure you don't eat muffins while hot as the caramel inside the eggs will be very hot. * When Easter eggs are not available, use Rolo chocolates or pieces of caramel-filled chocolate.
 Voila! Bon Appétit!
Read More......
Easter Cupcakes
Comments (1) | Friday, March 21, 2008
Happy Easter to you all!
Sorry I have been very slack with blogging, been very busy this week.
These are my easter cupcakes! Now before you judge I'm not much of a cupcake extrodinaire... but i'm going to get there one day! This is probably only the 3rd batch of cupcakes I've ever decorated properly! Just used a basic cupcake mix and icing mix from a recipe I found on www.taste.com.au
Makes 12
Ingredients
- 325g unsalted butter, softened
- 1 cup (220g) caster sugar
- 1 1/2 cups (225g) self-raising flour, sifted
- 3 eggs
- 1 tsp vanilla extract
- 1/2 cup (125ml) milk
- 3 cups (450g) icing sugar, sifted
- Food colouring of your choice
- 12 coloured chocolate Easter eggs, to garnish
Method
- Preheat the oven to 190°C. Line a 12-hole, 1/3-cup (80ml) muffin pan with paper cases.
- Place 225g butter in a food processor with the caster sugar, flour, eggs, vanilla extract and 1/4 cup (60ml) milk. Process until the mixture is smooth, then divide among the muffin cases. Place in the oven and bake for 15-20 minutes until risen and golden.
- Meanwhile, to make the icing, place the icing sugar, remaining 100g of butter and remaining 1/4 cup milk in the bowl of an electric mixer. Beat on medium-high speed for about 5 minutes or until the mixture is light and fluffy. Add a few drops of food colouring of your choice and beat to combine.
- Remove the cupcakes from the oven, allow to cool slightly, then transfer to a wire rack to cool completely. When cakes are cool, scoop the icing into a piping bag with a star nozzle, then use to ice cakes. Garnish each one with an Easter egg, then serve.

Read More......