


Recent Recipes
Week 26 - The Cookbook Challenge: Pistachio, White Chocolate and Honey French Macaroons
Comments (15) | Thursday, May 13, 2010

Cookbook Used: Afternoon Tea

I thought I was stumped for green week. I had two soups as possible ideas but then remembered things like green curry, green tea and then of course; pisatchios. I am still working my way through my massive bag of pistachios I got from Costco. Looking at the expiry date on it, I better use more pistachios before July!


Pistachio, White Chocolate and Honey French Macaroons
The Australian Women's Weekly
Get your hands on:
1/3 cup (45g) unsalted, roasted, shelled pistachios
3 egg whites
1. Preheat oven to 150°C/300°F. Grease oven trays; line with baking paper. (I would do this after you have finished making the macaroons as they have to set for 30 minutes before you put them in the oven)
2. Process nuts until finely ground.
3. Beat egg whites in small bowl with electric mixer until soft peaks form. Add caster sugar and few drops colouring, beat until sugar dissolves; transfer mixture to large bowl. Fold in 1/4 cup of the ground pistachios, sifted icing sugar and ground almonds in two batches.
4. Spoon mixture into piping bag fitting with 1cm (1/2 inch) plain tube. Pipe 4cm (1 1/2 inch) rounds about 2.5cm (1 inch) apart onto trays. Tap trays on bench so macaroons spread slightly. Sprinkle macaroons with remaining ground pistachios; stand 30 minutes.
5. Bake macaroons about 20 minutes, cool on trays.
6. Make the honeyed white chocolate ganache: bring cream to the boil in small saucepan. Remove from heat; pour over chocolate and honey in small bowl; stir until smooth. Stand at room temperature until spreadable.
7. Sandwich macaroons with ganache.
Makes 16.


Read More......
Green and Blacks Chocolate Brazil Soft-Baked Cookies
Comments (3) | Wednesday, March 31, 2010


Get your hands on:

Read More......
Baci Di Dama
Comments (12) | Thursday, September 17, 2009


250g unsalted butter, softened
110g icing sugar, sifted
1 1/2 teaspoons vanilla extract
250g plain flour
50g cocoa powder
105g hazelnuts, roasted, peeled and finely ground
Filling:
125g dark chocolate, chopped
30g unsalted butter
75g hazelnuts, roasted, peeled and finely ground
1. Use an electric mixer to beat the butter and icing sugar until light and fluffy, then add vanilla.
2. Stir together flour and cocoa and stir into butter mixture with ground hazelnuts until mixutre is well combined.
3. Take heaped tablespoons of the mixture and using your hands, roll into balls, then place on baking paper-lined oven trays and flatten slightly with your fingers.
4. Refrigerate biscuits for 2 hours or overnight, then bake at 180°C / 160°C fan-forced for 15 minutes or until firm to touch. Cool on trays for 5 minutes, then carefully transfer onto a wire rack to cool completely.
5. To make the filling; melt chocolate and butter in a small heatproof bowl over a saucepan of simmering water, then remove from heat, add ground hazelnuts and stir to combine well. Spread a little filling onto half of the cooled biscuits, then top with remining biscuits. Leave in a cool place for filling to set.
Filled biscuits will keep in an airtight container for up to 1 week, or in the freezer for up to 3 months.
Makes about 60, but ingredients can be halved to make fewer biscuits.

Read More......
Macarons with White Chocolate & Raspberry Ganache
Comments (8) | Thursday, August 6, 2009
Masterchef inspired lots of us to make things we had never made before. A few weeks ago, I attempted the art of macarons. Having just bought the latest edition of the Australian Gourmet Traveller because of it's gorgeous looking macarons on the front cover, I was keen to give them a go. Although, for some stupid reason I decided I was going to make them at 8.30 at night, which meant I was rather rushed. But I figured, if the Masterchef contestants could make macarons, pannacotta and a passionfruit slick all within 1.5 hours, surely I could do it too!
I ran out of time that night, so I had to make the raspberry ganache the following day and sandwich the macarons together.
They aren't the best looking macaroons, they were meant to look like this:
 Photo courtsey of the Australian Gourmet Traveller website
But for my first attempt they had the gooey centre and the macaron taste. I know alot of people that have thrown out their first batches of macarons so I was stoked that most of mine worked out! The hardest part was sifting the icing sugar and almond meal 3 times. Almond meal is very hard to sift, so my arms got a nice work out.
Next batch mine will look like the picture and I will take a photo to show you all, but for now, it's on with the recipe!
 Macarons with White Chocolate & Raspberry Ganache
Alice Storey
130g pure icing sugar
110g almond meal
105g eggwhites (about 2), at room temperature, left out overnight
65g caster sugar
4-5 drops rose food colouring
White Chocolate & Raspberry Ganache
50ml pouring cream
100g white chocolate
45g raspberries, coarsley chopped
1. Process icing sugar and almond meal in a food processor until finely ground, triple-sift into a large bowl and set aside. Whisk 90gm eggwhite in an electric mixer until soft peaks form (1-2 minutes). Add caster sugar, a tablespoon at a time, whisking continuously until incorporated and mixture is thick and glossy (2-3 minutes), then add food colouring. Stir in almond mixture in batches until incorporated and mixture slowly slides down sides of bowl when bowl is tilted. Add remaining eggwhite to loosen mixture, spoon into a piping bag with a 1cm plain nozzle, pipe 3cm-diameter rounds of mixture onto heavy baking-paper-lined oven trays, stand until a crust begins to form (4-5 hours).
2. Preheat oven to 140C. Bake macarons until firm but not coloured, swapping trays halfway through cooking (10-12 minutes), set aside, cool completely on trays.
3. Meanwhile, for white chocolate and raspberry ganache, bring cream just to the boil in a small saucepan. Remove from heat, add chocolate, stand until melted (5 minutes), stir until smooth and glossy. Refrigerate until firm yet still pliable (45 minutes-1 hour) then stir until smooth. Add raspberries, stir to form a ripple effect, then spoon a teaspoon of ganache onto half the macarons. Sandwich with remaining macarons and refrigerate until set. Macarons will keep for 1-2 days refrigerated in an airtight container.
This recipe appeared in the July 2009 issue of Australian Gourmet Traveller.
Serves 40.
 Voila! Bon Appétit!
Read More......
Snickerdoodles
Comments (4) | Friday, July 24, 2009
I've been wanting to make snickerdoodles for some time now since seeing them in a cookbook. Seeing Lorraine's cinnadoodles a while back made me want to make them even more! It's the glittery sugar coating that makes these babies look so delicious.
I made these to try and woo my new co-workers at my latest contract job. It's great being around people that love food, mainly snacking as much as I do! So these cookies went down exceptionally well during the day. One even commented they tasted like cinnamon doughnuts.
Snickerdoodles
250g butter, softened
1 teaspoon vanilla extract
1/2 cup (110g) firmly packed brown sugar
1 cup (220g) caster sugar
2 eggs
2 3/4 cups (410g) plain flour
1 teaspoon bicarbonate of soda
1/2 teaspoon ground nutmeg
1 tablespoon caster sugar extra
2 teaspoons ground cinnamon
1. Beat butter, extract and sugars in a small bowl with an electric mixer until light and fluffy. Add eggs, one at a time, beating until combined. Transfer to a large bowl.
2. Stir in sifted flour, soda and nutmeg, in two batches. Cover; refrigerate for 30 minutes.
3. Preheat oven to 180°C / 160°C fan-forced. Line oven trays with baking paper.
4. Combine extra caster sugar and cinnamon in a small shallow bowl. Roll level tablespoons of the dough into balls; roll balls in cinnamon sugar. Place balls about 7 cm apart on oven trays.
5. Bake about 12 minutes. Cool on trays.
Makes 42.
 Voila! Bon Appétit!
Read More......
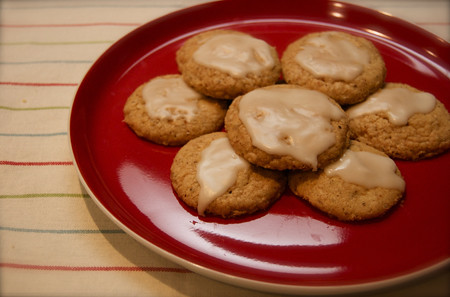
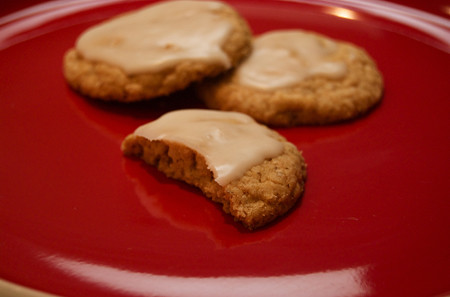
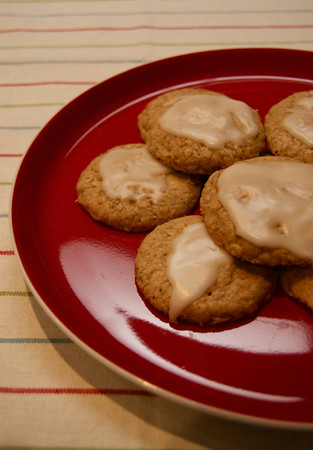
Lemon & Hazelnut Biscuits
Comments (2) | Wednesday, April 1, 2009
I've been wanting to try this recipe for a long time now. With some sad looking lemons in the fruit bowl, today was the day!
I didn't have any candied lemon to decorate the top with, but I don't think it is that necessary until you are perhaps making these for a present.
Very simple to make, and the one of the most amazing flavour combinations! I tend to love anything with hazelnuts since I grew up on Nutella. Then lemon icing tang adds a lovely finishing touch. I am just about to enjoy another with a cuppa tea!
Lemon & Hazelnut Biscuits
250g butter, at room temperature
1 1/2 (240g) cups icing sugar
2 tablespoons grated lemon rind
1 cup (150g) plain flour
1/2 cup (75g) self-raising flour
1/2 cup (50g) hazelnut meal
2-3 tablespoons lemon juice
20g candied lemon, to decorate (optional)
1. Preheat oven to 150°C or 130°C fan forced. Line three baking trays with baking paper.
2. Using an electric mixer, beat butter, and 1 cup of icing sugar until light and fluffy. Stir in lemon rind. Work in flours and hazelnut meal gradually, until a dough forms. Wrap in plastic wrap and chill for 1 hour.
3. Pinch off 1/2 tablespoons of dough and roll into balls. Place on prepared trays about 5cm apart and flatten slightly with palm of your hand. Chill for 20 mins.
4. Bake for 12-15 mins, or until golden brown. Set aside to cool on trays.
5. To make icing, combine remaining icing sugar with lemon juice in a small bowl until smooth. Spoon a little icing onto each biscuit and top with candied lemon if using. Set biscuits aside until icing sets. Store in an airtight container.
Makes 35.
 Voila! Bon Appétit!
Read More......
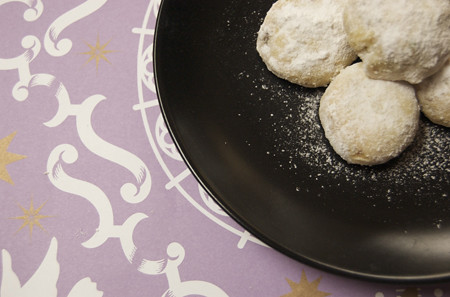
Pistachio & Lemon Bites
Comments (4) | Friday, March 13, 2009
I made these for a random casual dinner party last night. A lovely bunch of people gathered at Iron Chef Jason's house for a lovely dinner of pasta and Bondi Vet.
Whilst I'm sorry that the gluten free and vegan guests couldn't try these, they were a bit hit with everyone else.
It was a bit pain staking shelling 150 grams of pistachio nuts. So I shelled a few more grams to reward myself for the hard work.
Whilst the biscuit itself isn't very sweet, it's the icing sugar that brings the main sweetness to it. So make sure you smother it in icing sugar. The recipe says to "dust" with the icing sugar, but you actually need to rub the icing sugar all over the biscuit and then dust.
The lemon rind makes it a little bit refreshing too. You can easily eat more than one in a sitting! Perfect with a cup of my favorite, Earl Grey tea.
Pistachio & Lemon Bites
Donna Hay
300g butter, softened
3 tablespoon caster sugar
150g pistachio nuts, roughly chopped
2 1/2 cups plain flour, sifted
1 tablespoon lemon rind
icing sugar for dusting
1. Preheat the oven to 180°C. Place the butter and sugar in the bowl of an electric mixer and beat for 4 minutes or until light and creamy.
2. Add the pistachios and beat for 2 minutes. Fold through the flour and lemon rind and mix until will combined.
3. Roll tablespoonfuls of the mixture into balls, place on a baking tray lined with baking paper, flatten slightly and bake for 15-20 minutes. Cool on a wire rack and dust with icing sugar.
Makes 30.


 Voila! Bon Appétit!
Read More......
Fig & Oat Biscuits
Comments (1) | Tuesday, March 10, 2009
We had a few too many figs lying around the house this weekend and mum said if I wanted to use them I had better do it quick or they wouldn't be good anymore. Talk about baking under pressure!
They are as delicious as they look! I would say it's the little bit of cinnamon that really makes these biscuits special.
I would suggest you give these a whirl if you have some spare figs. Perfect with a cuppa tea.
Fig & Oat Biscuits
Donna Hay
3/4 cup brown sugar
125g butter, softened
1 egg
1 cup plain flour
1/4 teaspoon bicarbonate of soda (baking soda)
1 cup rolled oats
3/4 cup chopped dried figs
1/2 teaspoon cinnamon
3 large figs, thinly sliced
1. Preheat the oven to 180°C. Place the sugar and butter in the bowl of an electric mixer and beat until light and creamy. Add the egg and beat well.
2. Sift the flour and bicarbonate of soda over the butter mixture and fold in with the oats, dried figs and cinnamon.
3. Roll tablespoons of the mixture into balls and shape into 7cm rounds. Place on baking trays lined with non-stick baking paper and top with sliced figs. Bake for 20 minutes or until golden. Cool on wire racks.
Makes 15.


Voila! Bon Appétit!
Read More......
Chocolate Candy Cane Cookies
Comments (3) | Monday, March 2, 2009
I am currently walking around like a pregnant duck! And I am neither pregnant nor a duck.
I suppose you want to know why? I did too much exercise this weekend! 1 hour of personal training, then a nice long bike ride the day after. Too many walking lunges and squats has left me unable to walk properly... or do anything else without looking like a total idiot!
So I didn't go to the gym tonight, instead I baked some cookies! I'm sure my personal trainer would understand, who can resist chocolate after all? And it gives me a chance to use up some candy canes I've had lying around since Christmas.
They are awesome! I knew they would be as I put them in the oven. The scent of minty candy canes with lots and lots of chocolate....mmmmmm. Eat them when they are warm and the chocolate is still melting.
Chocolate Candy Cane Cookies
Donna Hay
110g butter, softened and chopped
1 cup (175g) brown sugar
1 egg
1 teaspoon vanilla extract
1 cup (150g) plain flour, sifted
1/4 cup (25g) cocoa, sifted
1/2 teaspoon bicarbonate of (baking) soda
120g dark chocolate, melted
280g dark chocolate, extra, chopped
120g candy canes, chopped
1. Preheat oven to 160°C. Place the butter and sugar in the bowl of an electric mixer and beat for 8-10 minutes or until light and creamy.
2. Add the egg and vanilla and beat until well combined. Add the flour, cocoa, bicarbonate of soda and melted chocolate and beat until just combined. Fold through the extra chopped chocolate.
3. Roll tablespoonfuls of the mixture into rounds. Place on baking trays lined with non-stick baking paper, allowing room for the cookies to spread, and flatten slightly. Press the chopped candy canes into the tops of the cookies and bake for 12-15 minutes or until the edges are firm. Allow to cool on the trays.
Makes 20.
Read More......
Oaty Chocolate Cookies
Comments (1) | Sunday, August 10, 2008
Is it bad that in August I still have an chocolate easter bunny looking at me, mocking me with it's thoughts..."eat me.... eat me!!!".... ok maybe I'm starting to sound like a psycho patient!
So anyway, I showed him who's boss!
 So I had to find a recipe that I hadn't made before using milk chocolate. It proved a bit of a challenge as most recipes want you to use dark chocolate, including this one from the blog Butter, Flour, Sugar.
So I thought milk chocolate would be fine instead of dark chocolate, and it was. No more easter chocolate until next year!! woot!
 Where's the bunny?
Oaty Chocolate Cookies
(adapted from a recipe found in ‘Bills Food’ by Bill Granger)
From Butter, Flour Sugar
150g unsalted butter, softened
230g brown sugar
1 egg
2 teaspoons vanilla extract
125g plain flour
1 teaspoon baking powder
200g rolled oats
180g dark chocolate, chopped
1. Preheat the oven to 180°C. Line a large baking tray with non-stick baking paper.
2. Cream the butter and brown sugar with a hand-held beater until light and fluffy
3. Add the egg and vanilla extract and beat well.
4. Fold in the flour, oats and chocolate. Roll tablespoonful sized balls and place them on your lined tray/s. Flatten them slightly with your fingers.
5. Bake for approximately 15 minutes, or until they become pale golden brown.

Read More......
Chocolate Chip Cookies
Comments (2) | Tuesday, April 8, 2008
What do you do with excess easter eggs?? Well I thought I better not eat myself sick, so I though I'd share the love and make them into chocolate chip cookies! These are the best choc chip cookies I've made at home. I love the coconut taste that comes through with the dessicated coconut too... mmmm =)

 Chocolate Chip Cookies
Donna Hay
125g butter, softened
1/2 teaspoon vanilla extract
1 cup brown sugar
2 eggs
2 cups plain flour, sifted
1 teaspoon baking powder
1 cup desiccated coconut
185g milk or dark chocolate, broken into small chunks
1. Preheat the oven to 190 degrees C. Place the butter, vanilla and sugar in a bowl and beat until creamy. Beat in the eggs.
2. Stir through the flour, baking powder, coconut and chocolate.
3. Roll tablespoonfuls of the mixture into balls. Place on baking trays lined with non-stick baking paper, allowing room for the cookies to spread, and flatten slightly.
4.Bake for 10-12 mins or until lightly browned. Makes 38.


Read More......


