


Recent Recipes
Poh's Orange Chiffon Cake
Comments (15) | Friday, July 9, 2010

If you haven't heard me whinge on twitter about how worried I've been to try my oven, then hear me now! Our place has an oven that is probably older than I am; and older ovens don't have the best reputation of cooking things well. You have to find the hot spots, and get to know it well. To top it all off, the temperate gauge is in Fahrenheit, and the numbers are all faded off! This has caused me to write them on, and use my iPhone for conversions every time I want to bake something.
So I thought, the real test to see how this oven is going is to bake a cake.
I'd been wanting to try Poh's orange chiffon cake she made on her first episode of her show; Poh's Kitchen.
I always begged my mum to buy a sponge cake whenever I went to the Asian grocery shop with her. Weather it be the orange one, or the awesome looking green pandan flavour. They were always so light and fluffy. For YEARS I had not had a sponge from the Asian grocer. I can't even remember the last time we had one.
To see the video of Poh making this cake: www.abc.net.au/tv/pohskitchen/stories/s2768097.htm

The only thing I hate about making cakes is lining the tin. Luckily for me, you don't need to line the cake tin for this one! The combination of coconut milk and vegetable oil doesn't require you to line the tin. The recipe even stresses to not line or grease the tin. Yippee!
I decided to leave out the layers of cream for 2 reasons:
- I couldn't be bothered
- The only cream my waistline needs is a firming and toning cream
I was almost going to leave out the ganache as it smelt so amazing as I unmolded it from the tin. However Hamsley insisted there be ganache as I had already prepared the hazelnuts to go over the ganache.

The end result: just like those cakes mum used to buy me (you know, minus the chocolate ganache and hazelnuts). So light, and incredibly fluffy, maybe not as tall as the ones we used to buy, but the flavours and textures were all spot on.
I made the correct amount of ganache, but if I had made the cream layers, the cake would have been higher, and I wouldn't have had so much excess ganache.
I can't wait to try this recipe again but doing a pandan flavour. If I can only ever make one cake again, I'd be happy if it was this one!

1. Preheat oven at 160°C fan forced/180°C regular.
2. Beat egg whites and cream of tartar with an electric mixer till soft peaks. Add sugar one tablespoon at a time a beat thoroughly after each addition till you achieve stiff peaks. Set aside.
3. In a separate bowl whisk egg yolks with caster sugar till fluffy. Add coconut milk, vegetable oil, orange juice, zest and self raising flour and whisk until combined. Gently fold the egg whites into the yolk mixture 3 batches.
4. Pour into a 22cm baba cake tin (do not use non-stick and do not grease). Bake 25 mins at 160°C fan forced or 30 mins at 180°C, or till skewer comes out clean. Leave oven on to roast hazelnuts.
5. When cake is out of the oven, immediately invert the cake still in the tin, and place on a cooling rack and leave to cool completely (about 1 1/2 hours).
6. Meanwhile, place hazelnuts on a shallow baking tray and roast until the skins are easily flaking off when rubbed, about 7 mins. Remove from the oven and pour onto the middle of a clean tea towel. Fold sides over the nuts and rub till all the skins have flaked off. Transfer the nuts onto a chopping board and chop to desired texture.
7. To make filling, whip the cream, sugar and vanilla till stiff but do not overbeat as cream will split. Cover with cling film and refrigerate until required.
8. When cake is cooled and ready to be assembled, run a knife around the edges of the tin and invert. Slice cake with a serrated knife into 3 equal layers. Spread a layer of the chantilly cream on each layer and sprinkle with chopped hazelnuts.
9. To make ganache, bring cream to the boil in a small saucepan. Remove from heat, add chocolate pieces and whisk till chocolate has melted and emulsified with cream. Using a spatula spread evenly over cake and sprinkle with additional chopped hazelnuts. For a tidier outcome, it’s best to ice the cake over a cooling rack so the extra ganache drips away.
Serves 8-10


Read More......
Chocolate Beer Cake
Comments (9) | Wednesday, March 31, 2010

Hamsley and Mum commented that they couldn't really taste the beer, but I was sure that I could. It was a nice light cupcake, mostly likely caused by the bubbles in the beer. I would make this again, I'm sure it would be a hit with men if you dragged them along to an afternoon tea!
Chocolate Beer Cake
Piklet & Pie
Get your hands on:
3 tablespoons heavy cream
3/4 teaspoon instant coffee

Read More......
Week 11: The Cookbook Challenge - Cherry Ripe Mud Cake
Comments (13) | Friday, January 29, 2010

I have a confession to make. I'm cheating this week (and my photos aren't that great). I was going to make rib-eye with espresso and mushroom for the 'mixed' theme... but I ran out of time, and I could have cooked something else, but I really don't have time or the energy to. So this is the cake I made for Hamsley's birthday this week. It was 'mixed' with love and brut force, using my arms.
I chose to make this cake as he said he liked Cherry Ripes when I was flicking through this cookbook, yelling out things that sounded delicious, he exclaimed; 'I like Cherry Ripes!'

Let's start with the first step: 250g butter, 2 cups of sugar, 200g dark chocolate, coffee and coconut milk..... last time I checked, no one lost weight living on foods like that.
However, I've never made a cake with coconut milk in it, so I knew it was going to be something special.

There was meant to be chocolate panels around the outside of the cake, but due to lack of time, and making this cake less fattening that it already was; I left them out. It would have looked rather spectacular though I think.
I'm so glad I didn't add the panels. I couldn't even finish my slice of cake, it was that rich. Anymore more chocolate, and I would have entered a food coma.


Delicious moist, dense and chocolately.... This one should be made once every 5 years or so, unless you want to enter a chocolate coma or become a contestant on The Biggest Loser in a hurry.
Cherry Ripe Mud Cake
Australian Women's Weekly
1 tablespoon instant coffee granules
1 2/3 cups (400ml) coconut milk
200g dark eating chocolate, chopped coarsley
2 cups (440g) caster sugar
3/4 cup (110g) self-raising flour
1 cup (150g) plain flour
1/4 cup (25g) cocoa powder
2 eggs, beaten lightly
1 teaspoon vanilla extract
2 x 85g Cherry Ripe bars, chopped coarsley
200g dark eating chocolate, chopped coarsely, extra
125g butter, chopped, extra
1 teaspoon vegetable oil
1. Preheat oven to slow (150°C / 130°C fan-forced). Grease deep 22cm-round cake pan; line base and side with baking paper.
2. Melt butter in large saucepan; add coffee, coconut milk, chocolate and sugar. Stir over heat until chocolate melts and sugar dissolves; cool to room temperature.
3. Whisk in sifted dry ingredients, then egg and extract; stir in half of the Cherry Ripe. Pour mixture into pan, top with remaining Cherry Ripe; bake about 1 3/4 hours. Stand cake 10 minutes; turn, top-side up, onto wire rack to cool.
4. Combine extra chocolate and extra butter in small saucepan; stir over low heat until smooth. Refrigerate until mixture is spreadable.
5. Meanwhile, make chocolate panels.
Chocolate Panels: combine chocolate and oil in medium heatproof bowl; stir over medium saucepan of simmering water until smooth. Cut two 6cm x 50cm strips of baking paper. Spread chocolate evenly over strips; lift strips to allow chocolate to drip off paper. Allow chocolate to set, then, using a ruler as a guide, cut chocolate into 4cm panels with a sharp knife. Carefully peel away baking paper.
Tip: You can also melt the chocolate for the chocolate panels in a microwave oven; melt on medium (55%) about 1 minute, stirring twice during cooking. Stir in the oil once the chocolate has melted.
6. Spread the chocolate mixture all over cake; place chocolate panels around side of cake. Serve with whipped cream, if desired.
Serves 12.

Read More......
Happy 2nd Birthday with a Raspberry Hazelnut Cake
Comments (33) | Sunday, January 24, 2010


And because I am an absolute idiot...or the interweb/computer is, I lost the first draft of this post, and I'm having to type it for the 2nd time. It only seems fitting doesn't it.
*sigh*
It doesn't help that I've left half my files and the recipe at another location, and I'm having to get Dad to send them through to me, whilst rummaging through my things (thanks Dad and Mum for you help!!)

Learning more and more about food has thought me to appreciate new flavours. I rediscovered that mushrooms aren't as bad as I thought they were, olives can be quite alright if you chop them up into tiny tiny pieces and mix them with the right ingreidents, and that people will love you for life if you feed them something nice.

Anyways, this cake is really quite delicious if I may say so myself. But you know, anything with hazelnuts is bound to be delicious; nutella, fererro rocher, frangelico, hazelnuts.... the list goes on. The cake is very moist, most likely thanks to the sour cream, and the juicy raspberries. Perfect for an afternoon tea on a lazy Sunday afternoon.

Raspberry Hazelnut Cake
Australian Women's Weekly
Get your hands on:
250g butter, softened
2 cups (440g) caster sugar
6 eggs
1 cup (150g) plain flour
1/2 cup (75g) self-raising flour
1 cup (110g) hazelnut meal
2/3 cup (160g) sour cream
300g fresh or frozen raspberries
1/4 cupe (40g) icing sugar
2 tablespoons hazelnut-flavoured liquer (Frangelico)
1/2 cup (120g) sour cream
1/2 cup (70g) roasted hazelnuts, chopped finely
1. Preheat oven to moderate (180°C / 160°C fan-forced). Grease deep 22cm-round cake pan; line base and side with baking paper.
2. Beat butter and sugar in medium bowl with electric mixer until light and fluffy; add eggs, one at a time, beating until just combined between additions. (Mixture will curdle at this stage, but will come together later.)
3. Transfer mixture to large bowl; stir in sifted flours, hazelnut meal, sour cream and raspberries. Spread mixture into pan.
4. Bake about 1.5 hours. Stand cake in pan for 10 minutes; turn, top-side up, onto wire rack to cool.
5. Meanwhile, make mascarpone cream: combine mascarpone, icing sugar, liqueur and sour cream in medium bowl. Stir until smooth; stir in nuts.
6. Place cold cake on serving plate. Spread cake all over with mascarpone cream.
Tip: If using frozen raspberries, don't thaw them; frozen berries are less likely to "bleed" into the cake mixture.
Serves 12.

Read More......
Orange Cake
Comments (2) | Saturday, June 27, 2009
To start the weekend, have a slice of this delicious orange cake. It's so moist and light, you'll wonder why you never made it before, and wonder when you can make it again!
Orange Cake
150g butter, softened
1 tablespoon finely grated orange rind
2/3 cup (150g) caster sugar
3 eggs
1 1/2 cups (225g) self raising flour
1/4 cup (60ml) milk
3/4 cup (120g) icing sugar
1 1/2 tablespoons orange juice
1. Preheat oven to 180°C / 160°C fan-forced. Grease deep 20cm round cake pan; line base with baking paper.
2. Beat butter, rind, caster sugar, eggs, flour and milk in medium bowl on low speed with an electric mixer until jude combined. Increase speed to medium; beat about 3 minutes or until mixture is smooth and pale in colour.
3. Spread mixture into pan; bake about 40 minutes. Stand cake in pan 5 minutes before turning; top-side up, onto wire rack to cool.
4. Meanwhile, combine sifted icing sugar and juice in small bowl; stir until smooth. Spread icing over cake.
Serves 12.
 Voila! Bon Appétit!
Read More......
Lime & Mango Cake
Comments (0) | Wednesday, June 17, 2009
My favorite fruit would have to be mango. Although coming in close behind are now lychees.
Mum bought some good looking mangoes last week, but when we ate one we were rather disappointed. The texture felt funny, and it wasn't that sweet. So I did what I usually do with fruit that isn't that fantastic to eat anymore... I baked with it!
The mango chunks are really nice and help keep the cake moist. The lime icing has a nice zing, adding a much needed sourness to the sweet cake. The use of yoghurt instead of milk also helps to keep the cake moist. Although the yoghurt taste isn't that prominent. Perhaps it would be more yoghurt tasting if you used a vanilla flavour, but I used a plain variety as the recipe stipulates.
Lime & Mango Cake
Bill Granger
300g plain flour
2 1/2 teaspoons baking powder
180g unsalted butter, softened and roughly diced
250g caster sugar
1 1/2 teaspoons finely grated lime zest
4 eggs
200ml plain yoghurt
1 large mango, diced
Lime Icing
185g icing sugar
2 tablespoons lime juice
1 tablespoon unsalted butter, melted and cooled
shredded lime zest
1. Preheat the oven to 170°C and grease a 26cm ring tin.
2. Sift the flour and baking powder together. Beat together the butter, sugar and lime zest until pale and creamy. Add the eggs one at a time, beating well after each addition. Fold in the flour, alternating with the yoghurt, in two batches.
3. Gently fold the mango through the batter and pour into the tin, smoothing the surface. Bake for 45 minutes, or until a skewer poked into the middle comes out clean. Leave to cool in the tin for 5 minutes before turning out onto a wire rack to cool completely.
4. To make the icing, beat together all the ingredients for 30 seconds, or until smooth. The icing should be of a pouring consistency, if it's too thick, add a touch more lime juice.
5. Drizzle the cake generously with the lime icing and decorate with the shredded lime zest.
Serves 8-10.
 Voila! Bon Appétit!
Read More......
Chocolate Fudge Cake
Comments (3) | Monday, June 15, 2009
There is something so satisfying when you bake a cake, give it to a friend and they go...."mmmmmmmm......" and give you the thumbs up when it's still in their mouth. And well, quite frankly it would be impossible not to have that reaction when you bite into a slice of this chocolate fudge cake! I made mine with leftover Lindt dark chocolate from Easter (yes folks, Easter!). They are cut into brownie slices, but you'll find it hard to stop at one slice!
They would also be great with some whipped cream, or even chocolate mousse for an all round chocolate hit.
250g dark eating chocolate, chopped
125g butter, chopped
2/3 cup (150g) caster sugar
2/3 cup (100g) self-raising flour
4 eggs, lightly beaten
1. Preheat oven to 180°C/160°C fan-forced. Grease 19cm x 29cm lamington pan; line base and long sides with baking paper, extending paper 5cm above sides.
2. Stir chocolate and butter in a medium heatproof bowl over a medium saucepan of simmering water (do not allow the water to touch base of bowl); cool.
3. Combine chocolate mixture and remaining ingredients in a medium bowl; beat on low speed with an electric mixer until ingredients are combined. Increase speed to medium; beat for 3 minutes or until mixture is changed in colour and smooth.
4. Pour mixture into pan; bake about 30 minutes. Stand cake 5 minutes before turning, top-side up, onto wire rack to cool. Serve dusted with sifted icing sugar if desired.
Serves 12.
Read More......
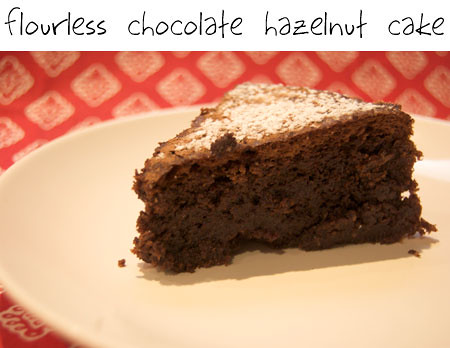
Flourless Chocolate Hazelnut Cake
Comments (2) | Tuesday, May 26, 2009
This is hands down THE BEST cake I have ever made!
I really wanted to make this because my friend Kiran is limited to what she can eat as she can only eat lactose free, wheat free, gluten free, things. This recipe was free from everything, except maybe the chocolate, but she didn't have an allergic reactions.
The big bonus is that it was so incredibly moist. Usually flourless cakes I've had before have been dry and tend to sink in the middle. This cake didn't sink at all, even on the car ride to our dinner destination! The hazelnut meal is probably the key ingredient in this recipe, balancing out the richness of the chocolate.
This cake is going to be made quite a few times this year, I can feel it now!
Flourless Chocolate Hazelnut Cake
1/3 cup (35g) cocoa powder
1/3 cup (80ml) hot water
150g dark eating chocolate, melted
150g butter, melted
1 1/3 cups (295g) packed brown sugar
1 cup (100g) hazelnut meal
4 eggs, separated
1 tablespoon, cocoa powder, extra
1. Preheat oven to 180°C / 160°C fan-forced. Grease and line a 23cm-round cake pan.
2. Blend cocoa with the water in a large bowl until smooth. Add chocolate, butter, sugar, hazelnut meal and egg yolks, stir until combined.
3. Beat egg whites in a small bowl with an electric mixer until soft peaks form. Fold into chocolate mixture in two batches.
4. Pour mixture into pan, bake for about 1 hour. Stand cake in pan for 15 minutes before turning, top-side up, onto wire rack to cool. Dust with sifted extra cocoa.
Serves 8.
Read More......
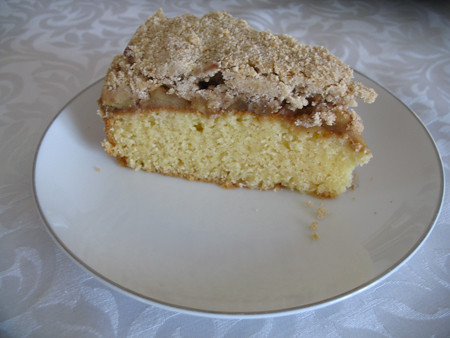
Apple Streusel Cake
Comments (5) | Monday, May 11, 2009
I wanted to bake something for Mother's Day for us all to enjoy after lunch out with my grandma, dad and mum. We had an abundance of apples in the house, and well I love pretty much anything with apples so I thought I'd try this recipe.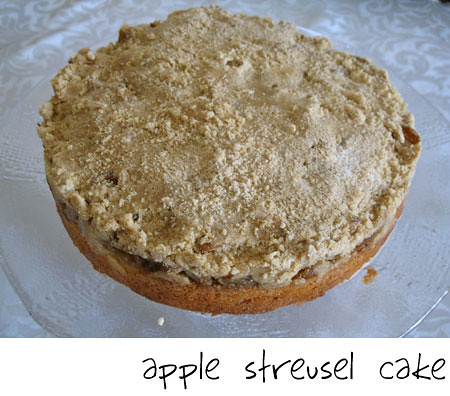
Apple Streusel Cake
200g butter, softened
2 teaspoons finely grated lemon rind
2/3 cup (150g) caster sugar
3 eggs
1 cup (150g) self-raising flour
1/2 cup (75g) plain flour
1/3 cup (80ml) milk
5 medium apples
25g butter, extra
1/3 cup (75g) firmly packed brown sugar
Streusel
1/2 cup (75g) plain flour
1/4 cup (35g) self-raising flour
1/3 cup (75g) firmly packed brown sugar
1/2 teaspoon ground cinnamon
80g cold butter, chopped finely
1. Make the streusel: process flours, sugar and cinnamon until combined. Add butter; process until ingredients just come together. Wrap in plastic wrap; freeze about for about 1 hour or until firm.
2. Preheat oven to 180°C / 160°C fan-forced. Grease and line a 23cm-round cake pan.
3. Beat butter, rind and caster sugar with an electric mixer until light and fluffy. Beat in eggs, one at a time. Transfer to large bowl; stir in sifted flours and milk; in two batches. Spread mixture into pan, bake 25 minutes.
4. Meanwhile, peel, core and quarter apples; slice thinly. Melt extra butter in a large frying pan, add apple; cook, stirring, about 5 minutes or until browned lightly. Add brown sugar; cook, stirring, about 5 minutes or until mixture thickens slightly. Set aside.
5. Remove cake from the oven. Working quickly, top cake with apple mixture; coarsly grate streusel over apple. Return to oven; bake about 25 minutes. Stand in cake pan for about 10 minutes before turning, top-side up, onto a wire rack to cool.
Serves 16.
 Voila! Bon Appétit!
Read More......
Cinnamon Teacake
Comments (5) | Thursday, May 7, 2009
It's been a while since I did some baking. I have been a bit of a cripple and not able to walk on my foot for about a week, also trying not to eat so much stuff that makes my bum bigger. But that doesn't mean I can't bake for others and still and have a little taste myself.
I bought a couple of new cookbooks on the weekend and this recipe looked so easy to make with all staple ingredients I always have in the pantry.
I thought it was a little weird that there was no cinnamon throughout the cake and it was just sprinkled on top but I thought I'd follow it as per the instructions and see how it turned out.
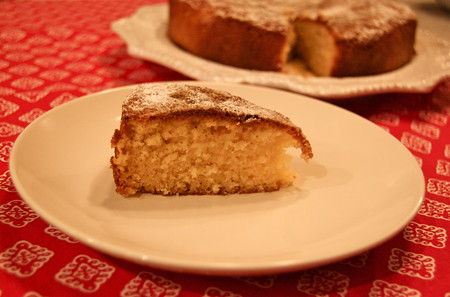
A really light cake, definitely perfect for an afternoon tea!
Cinnamon Teacake
60g butter, softened
1 teaspoon vanilla extract
2/3 cup (150g) caster sugar
1 egg
1 cup (150g) self raising flour
1/3 cup (80ml) milk
10g butter, extra melted
1 teaspoon ground cinnamon
1 tablespoon caster sugar, extra
1. Preheat oven to 180°C / 160°C fan-forced. Grease and line a 20cm-round cake pan.
2. Beat butter, extract, sugar and eggs in a small bowl with electric mixer until light and fluffy. Stir in sifted flour and milk.
3. Spread mixture into pan: bake about 30 minutes. Stand cake in pan for 5 minutes before turning out.
4. Brush top of cake with melted butter; sprinkle with combined cinnamon and extra sugar.
Serve warm with whipped cream or butter if desired.
Serves 10.
 Voila! Bon Appétit!
Read More......
Orange & Coconut Cake
Comments (2) | Thursday, April 16, 2009
More Easter baking! This cake is so incredibly easy to make, you could make it anytime of year, just leave off the Easter eggs.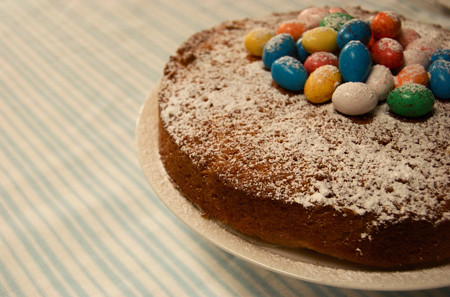
Orange & Coconut Cake
Kate Murdoch
1 cup caster sugar
125g unsalted butter, softened
3 teaspoons finely grated orange rind
4 eggs
1 cup (160g) self-raising flour, sifted
1 3/4 cups (150g) desiccated coconut
2 tablespoons freshly squeezed orange juice
Easter eggs and icing sugar, to serve
1. Preheat oven to 160°C. Place sugar, butter and orange rind in a large bowl, and beat with electric beaters for 4 minutes until light and creamy. Add eggs, one at a time, beating well between additions.
2. Fold flour and coconut through mixture, along with orange juice. Spoon mixture into a 22cm-round cake pan greased and lined with baking paper. Cook for 50 minutes or until cooked through when tested with a skewer.
3. Allow to cool, then decorate with Easter eggs and a dusting of icing sugar.
Read More......
Chocolate-Orange Marble Cake
Comments (3) | Wednesday, April 15, 2009
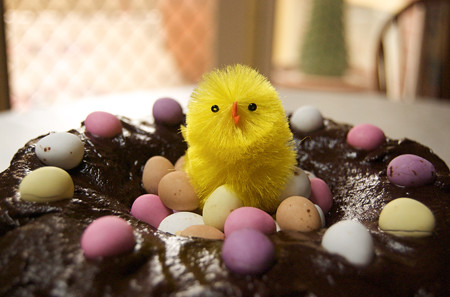
I wanted to make dessert for Easter Sunday lunch with the family. Being Easter it had to involve chocolate didn't it?
I didn't do the marble effect very well on this one, it looks more like a top deck cake than anything but it was fantastic. Chocolate and orange is always a good combination and this didn't disappoint. The chocolate fudge sauce is definitely a must when doing this cake, so don't leave it out! I just need to get some fancy Bundt tins....hmmm my birthday is coming up *wink wink*!
Chocolate-Orange Marble Cake
Donna Hay
1 1/3 cups (330ml) milk
2 cups (440g) caster sugar
1 teaspoon vanilla extract
250g butter, melted
1 1/2 cups (225g) plain flour, sifted
1/4 cup (40g) self-raising flour, sifted
2 eggs
1/4 cup (20g) cocoa, sifted
150g dark chocolate, melted
1 tablespoon finely grated orange rind
1-2 drops orange food colouring
chocolate fudge sauce
1/3 cup (80ml) single (pouring) cream
200g dark chocolate, chopped
1. Preheat oven to 160ºC (320ºF). Place the milk, sugar and vanilla in a bowl and whisk to combine. Add butter and whisk to combine.
2. Add flours and eggs and whisk until smooth.
3. Divide mixture into 2 bowls. Add the cocoa and chocolate to one and whilst until smooth. Add the orange rind and food colouring to the other and whisk until smooth.
4. Pour chocolate mixture into a well greased 8 cup-capacity (2 litre) Bundt tin. Drop spoonfuls of the orange mixture onto the chocolate and gently swirl with a butter knife to create a marble effect.
5. Bake for 1 hour 10 minutes or until cooked when tested with a skewer. Cool in tin for 10 minutes. Turn onto a wire rack t cool completely.
6. To make the chocolate fudge sauce, place the cream and chocolate in a saucepan over a low heat and cook, stirring, until melted and smooth. Pour over the cake to serve.
Serves 8-10.
 Voila! Bon Appétit!
Read More......
Lamington Cake
Comments (0) | Friday, April 3, 2009
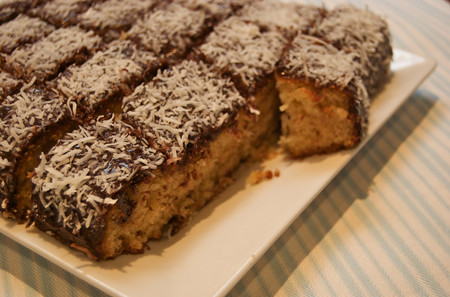
Last week I promised my work mates some baked goods on Friday. I was keen to do something with chocolate (oh how unlike me right?), but I wanted a recipe where I didn't have to go and buy lots of ingredients. I've been going through my massive magazine collection and found this cake that looked yumo!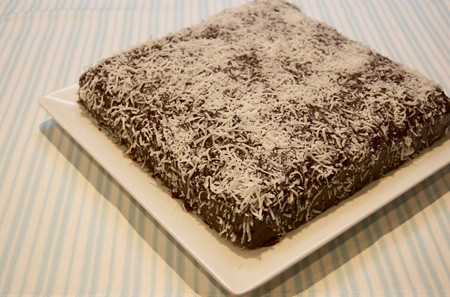
It was yum! Whilst for some reason when I took my first taste I was a bit upset as it wasn't as soft and spongy like a lamington, I had to remind myself it was actually a "cake". Everyone who got a slice loved it.
If you want, you can slice it in half and put in cream and jam.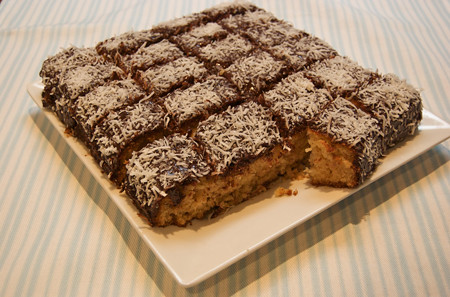
Valli Little & Amanda Biffin
190g unsalted butter, softened
1 cup (220g) caster sugar
2 teaspoon vanilla bean pasta or vanilla extract
3 eggs
2 1/3 cups (350g) self-raising flour, sifted
1 cup (250ml) milk
220g dark chocolate
1 cup (25oml) thickened cream
1 cup desiccated or shredded coconut
1. Preheat the oven to 170°C. Grease and line a 20cm square cake pan.
2. Process butter and sugar in a processor for 2 minutes until light. Add 1 teaspoon vanilla. Add eggs one at a time, pulsing after each until just combined.
3. In 3 alternating batches, add flour and milk, pulsing to combine. Pour into pan and bake for 55-60 minutes until skewer inserted in centre comes out clean. Cool for 5 minutes, then turn onto a rack to cool completely.
4. Meanwhile, stir chocolate, cream and remaining vanilla in a heatproof bowl over simmering water until smooth (don't let the bowl touch the water). Chill for 20 minutes to thicken. Spread this icing over the cake, then sprinkle top and sides with coconut.
Serves 8-10.
 Voila! Bon Appétit!
Read More......
Pecan & Apple Crumble
Comments (2) | Wednesday, November 19, 2008
A bit of mid-week baking to make the week a little sweeter.
This cake was so nice and moist, whilst remaining light and fluffy. The cinnamon in the crumble really makes the cake I think. The sultanas break it up and make it slightly healthier than say a chocolate cake... well that's what I tell myself anyways!
Perfect with a cup of tea, something your gran would love!
Pecan & Apple Crumble
250g butter, chopped at room temperature
3/4 cup caster sugar
1 teaspoon vanilla extract
2 eggs
1.5 cups plain flour
1/2 cup self-raising flour
1 teaspoon bicarbonate of soda
1 cup milk
1 Granny Smith apple, peeled, cored, grated
3/4 cup sultanas
Crumble Topping
1 cup finely chopped pecans
2 tablespoons brown sugar
1/2 teaspoon cinnamon
1. Preheat oven to moderate, 180°C. Lightly grease a 23cm springform pan. Line base with baking paper.
2. In a large bowl, using an electric mixer, cream butter, sugar and vanilla until light and fluffy. Add eggs, one at a time, beating well after each addition.
3. Fold combined sifted flours and bicarbonate of soda into the creamed mixture alternately with milk. Mix in apple and sultanas. Spread the mixture into pan.
4. Crumble Topping: Combine all ingredients in a small bowl. Sprinkle over cake mixture in pan, pressing in gently.
5. Bake for 50-60 minutes until cooked when tested with a skewer.
Serve warm, with cream.
Read More......
Hazelnut and Almond Cake
Comments (0) | Monday, November 17, 2008
This recipe wasn't destined to be on my blog. My mum started making it then we had an old family friend drop by so the cake was stuck at step 1. I ended up finishing it off for her whilst she socialized the night away.
If you like hazelnuts, this one is for you! Coming from someone who could live on Nutella, I was in heaven. It was light and fluffy from the almond and hazelnut meal, with a lovely chocolate frosting.
The cake was very flat though! I would suggest using a 20cm tin instead of the suggested 22cm tin. I have since added this recipe to my recipe book.
Hazelnut and Almond Cake
90g Nuttelex spread (or butter)
1/2 cup firmly packed brown sugar
2 eggs, seperated, plus 2 extra yolks
1 cup hazelnut meal
1 cup almond meal
1/4 cup cocoa powder, sifted
frosting:
1/2 cup icing sugar, sifted
1/4 cup cocoa powder
2 tablespoons Nuttelex spread
1 tablespoon soy milk
1. Preheat oven to moderate, 180°C. Grease a 22cm round cake pan. Line the base with baking paper.
2. In a large bowl, use electric mixer to beat Nuttelex and sugar together until light and fluffy. Beat in egg-yolks. Mix in hazelnut and almond meal, followed by cocoa.
3. In a small bowl, with an electric mixer, beat egg-whites until stuff peaks form. Fold into cake mixture. Spoon mixture into prepared pan. Bake for 15-20 minutes, until cooked when tested with a skewer. Cool in pan for 10 minutes, then turn onto wire rack to cool completely.
4. Frosting: in a small bowl, combine icing sugar, cocoa and Nuttelex. Add milk gradually, beating with a wooden spoon until smooth. Spread over cooled cake.
Serves 8.
Read More......
Chocolate Mousse Cake
Comments (1) | Friday, November 14, 2008
The final course, dessert.
To see a better picture of what it should look like, click here.
Or you can just drool over mine:
Chocolate mousse cake, gooey in the middle with a nice coffee marscarpone cream and ice-cream. I didn't have any chocolate sorbet so I just used plain vanilla ice-cream. I also didn't do the chocolate leaf but who cares, it tasted amazing!
Very rich, probably something to do with the 500g of dark chocolate it has in it! I think I chilled mine for too long so it could have been a bit gooey-er, however it was still a winner with the family.
The recipe says "serves 4" but it serves more like 8-10 as you wouldn't want a huge slice or you might go into diabetic shock (well not really, it can get a bit sweet after a medium sized slice).
Try it and see, it will be love at first bite!
Chocolate Mousse Cake
Taste website
500g dark chocolate
2 tbs golden syrup
125g unsalted butter
4 eggs
1 tbs caster sugar
1 tbs plain flour, sifted
Melted chocolate, to decorate
Chocolate sorbet, to serve
Coffee Marscarpone
200g mascarpone cheese
2 tbs instant coffee
2 tbs pure icing sugar
1. Preheat oven to 220°C. Grease and line the base of a 20cm round spring-form cake pan with non-stick baking paper.
2. Melt the chocolate, golden syrup and butter in a bowl over a saucepan of gently simmering water. Set aside to cool slightly.
3. Place eggs and sugar in the bowl of an electric mixer or use an electric hand beater and beat on high for 10 minutes until very thick and pale. Gently fold in the flour then fold in the chocolate mixture until combined. Pour into the cake pan and bake on the middle shelf of the oven for 12 minutes. Remove from oven and run a knife around the edge of the cake. Remove collar from cake pan and transfer the cake to the fridge for 1 hour to cool (this step is important as it sets the middle of the cake).
4. Meanwhile, to make the coffee mascarpone, dissolve coffee in 1 tablespoon of boiling water and set aside to cool. Beat together the mascarpone, coffee and sugar in a bowl until stiff.
5. To make the chocolate leaf, brush non-toxic leaves with the melted chocolate. When cool, peel the leaf off.
6. Slice the cake and serve with a dollop of coffee mascarpone, a chocolate leaf on top and a scoop of sorbet on the side.
Serves 4 (but i think you can serve at least 8!)
Read More......
Chocolate Cherry Cake
Comments (2) | Monday, November 10, 2008
The moment I saw this recipe I knew I had to make it.
Chocolate (my favorite), cherries (always a favorite), cake (makes everyone happy)!
I didn't have any fresh cherries as they are not quite in season, and the ones you can get are so overpriced! I didn't have any frozen ones on hand either but I did have some canned cherries.
I should have soaked them in sugar as they were a bit sour in the cake. The cake was still fantastic though, although I will make it with fresh or frozen cherries next time.
I chose to serve mine with ice-cream and some of the spare canned cherries.... delicious! Chocolate Cherry Cake
BBC Australian Good Food magazine
100g good quality dark chocolate, chopped
1 cup (220g) brown sugar
1/2 cup (50g) cocoa powder
1/2 cup (125ml) boiling water
2 egg yolks
2/3 cup (100g) wholemeal flour
4 eggwhites
2.5 cups (310g) pitted fresh or frozen cherries, plus extra to serve
1 apple, grated
icing sugar, to dust
1. Preheat oven to 180C or 160C fan. Line base and sides of a 20cm square pan with baking paper.
2. Place chocolate, sugar, cocoa and boiling water in a bowl. Stir, set aside for 2 mins, then stir again until smooth. Whisk in egg yolks, then fold in flour.
3. Beat eggwhites with an electric mixer until firm peaks form. Fold through chocolate mixture. Fold in pitted cherries and apple. Spoon into prepared pan. Bake for 35 mins, until a skewer inserted comes out clean. Cool in pan. Cut into squares, comes out clean. Cool in pan. Cut into squares, dust with icing sugar and serve with extra cherries.
Serves 10.
 Voila! Bon Appétit!
Read More......


