


Recent Recipes
Bircher Muesli
Comments (10) | Thursday, December 17, 2009

I didn't even know what bircher muesli was all about for quite some time. That was until I tried it on a recent trip to Brown Sugar Cafe.... it was ❤ at first bite.
So, in an attempt to save money, I made a delicious Sunday breakfast at home, with freshly made coffee from our coffee machine. It was so damn good, I made it again the weekend after!


Given that I love pretty much anything with apple in it, even down to shampoo; I really really loved this recipe. I could happily eat it everyday for breakfast. The most fiddly part of the whole dish is having to grate an apple. But if you can get over that, you'll have yourself a tasty treat!

Donna Hay
1 1/2 cups (150g / 5 1/4 oz) rolled oats
1 cup (250ml / 8 fl oz) apple juice, warmed
2 green apples, grated
1 cup (250g / 8 oz) thick natural yoghurt
1/2 cup silvered almonds
honey, to serve
1. Place the oats and apple juice in a large bowl, cover with plastic wrap and allow to stand for 30 minutes or until the oats are softened.
2. Stir in the grated apple.
3. To serve, divide the yoghurt between 4 serving glasses, top with the oat mixture, almonds and honey.
Serves 4.

Read More......
Gingerbread House
Comments (27) | Tuesday, December 15, 2009

It took me pretty much the good part of a day getting the architectural plans from Martha Stewart, the foundation mixture together from Donna Hay, and the exterior decorating and landscape gardening done.

I wanted to stick on pretzels all around the sides to make it look like a log cabin, but after my epic cooking efforts on Saturday, and not having any pretzels in the house... there was a big case of the C.B.F.s
Mum wanted me to add more lollies to the side of the house, but I didn't want one of those super tacky, over candied houses. I'm very happy with the end results. As to whether I'd do one again... I would say yes. But I would make sure I wasn't planning on cooking 2 other things on the same day!

Gingerbread House
Donna Hay
1.2kg (7 1/2 cups) plain flour
3 teaspoons bicarbonate of soda, sifted
1 1/2 cups (265g) brown sugar
1 tablespoon ground ginger, sifted
375g butter
1 2/3 cups (580g) golden syrup
Icing
4 cups (640g) icing sugar, sifted
3 eggwhites
1/2 teaspoon cream of tartar
assorted lollies to decorate

2. Combine both quantities of dough and knead to bring together. Divide dough into thirds. Lightly grease three 40cm x 30cm cookie trays (your trays should have a lip them). Divide dough between trays and press into tray, smooth the top with the back of a spoon. Bake, in batches, for 25-30 mintues or until dark golden. Turn out onto wire racks and allow to cool completely. (I cut out my walls and windows instead of baking slab pre-casts).
3. To make the icing, place the sugar, eggwhites and cream of tartar in the bowl of an electric mixer and beat for 4-5 minutes or until light and fluffy. Place the icing in a piping bag with a 1cm round nozzle.
4. To assemble:
a) Use a large serrated knife and cut each gingerbread sheet in half. Use a ruler as a guide. Set aside four halves; two for the walls and two for the roof.
b) Use the serrated knife to cut two even-sized triangles from the top of the remaining two halves to create the side walls of the house and discard the triangles.
c) Secure one of the rectangular walls and one of the side walls to a cake board with the icing and allow to dry until firm. Support the walls against a tall jar until the icing is dry.

e) Secure each of the roof pieces to the sides of the house suing the icing and allow to dry complely.


Read More......
Beef and Beer Individual Pies
Comments (7) | Thursday, December 3, 2009

We made these pies last weekend for dinner from Donna Hay's; No Time To Cook, cookbook.


The meat was so tender, and the shortcrust pastry was nice instead of the usual puff pastry.
The recipe makes 6 pies, so there are freezing instructions listed below should you want to have some on hand for those nights you can't be bothered cooking!

2 tablespoons olive oil
1kg chuck steak, cubed
2 brown onions, chopped
2 cloves garlic, crushed
4 sprigs thyme
2 bay leaves
375ml beer
2 cups (500ml) beef stock
8 chat (baby) potatoes, quartered or 3 normal size potatoes, largely cubed
2 tablespoons cornflour
2 tablespoons water
1 cup (120g) fresh or frozen peas
2 sheets (25cm x 25cm) store-bought shortcrust pastry
beaten egg, for brushing
1. Heat oil in a saucepan over medium-high heat. Add beef and cook, in batches, until well browned. Remove beed using a slotted spoon and set aside. Add garlic, onion, thyme and bay leaves and cook for 3 minutes or until onion is soft. Add beer and cook for 2 minutes to reduce slightly. Return beef to the pan and add stock and potatoes. Cover pan, reduce heat and simmer gently for 1 hour, or until beef is tender.
2. Combine water and cornflour, stir into the beef mixture for 3 mintues or until sauce thickens.
3. Remove from heat, add peas and cool the mixture slightly before dividing amount 6 x 330ml capacity ramekins or pie dishes.
4. Preheat the oven to 200°. Cut pastry lids to fit ramekins, place on top of pies and brush with egg. Bake pies for 20 minutes or until pastry is lightly golden.
To freeze, wrap the pie dishes in layers of baking paper, plastic wrap and aluminium foil to seal. Freeze for up to 3 months.
Recipe makes 6.

Read More......
White Chocolate & Macadamia Cupcakes
Comments (22) | Wednesday, October 28, 2009


I adorned them with these cute buttons I picked up from Donna Hay's range at David Jones. Billy from A Table For Two asked if they were for a baby shower. They weren't on this occassion, but should one of my friends get knocked up, I'll whip up a batch for their baby shower!

185g unsalted butter, softened
3/4 cup caster sugar
1 teaspoon natural vanilla extract
3 eggs
1 cup self-raising flour
1/4 cup plain flour
125ml milk
100g white chocolate, chopped
80g macadamia nuts, chopped
ready-made icing decorations, such as buttons by Donna Hay
Royal Icing (frosting)
2 cups icing sugar, sifted
2 egg whites
1. Preheat the oven to 180°C / 160°C fan-forced. Line 12 standard muffin holes with paper cases.
2. Beat the butter, sugar and vanilla together with electric beaters until light and creamy. Add the eggs, one at a time, beating well after each addition. Sift the flours together and fold in alternately with the milk, chocolate and macadamia.
3. Divide the mixture evenly among the cases. Bake for 15 minutes, or until a skewer comes out clean when inserted into the centre of a cake. Transfer onto a wire rack to cool.
4. To make the royal icing, beat the icing sugar and eggs whites together for 5 minutes until white and glossy. Decorate each cake with the icing and little icing decorations.
Makes 12.

Read More......
Chocolate-Orange Marble Cake
Comments (3) | Wednesday, April 15, 2009
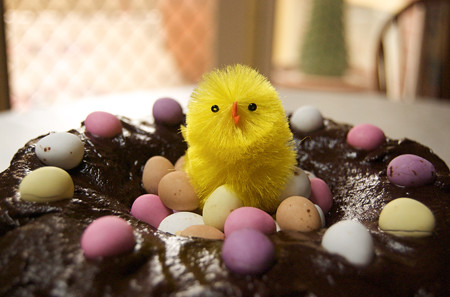
I wanted to make dessert for Easter Sunday lunch with the family. Being Easter it had to involve chocolate didn't it?
I didn't do the marble effect very well on this one, it looks more like a top deck cake than anything but it was fantastic. Chocolate and orange is always a good combination and this didn't disappoint. The chocolate fudge sauce is definitely a must when doing this cake, so don't leave it out! I just need to get some fancy Bundt tins....hmmm my birthday is coming up *wink wink*!
Chocolate-Orange Marble Cake
Donna Hay
1 1/3 cups (330ml) milk
2 cups (440g) caster sugar
1 teaspoon vanilla extract
250g butter, melted
1 1/2 cups (225g) plain flour, sifted
1/4 cup (40g) self-raising flour, sifted
2 eggs
1/4 cup (20g) cocoa, sifted
150g dark chocolate, melted
1 tablespoon finely grated orange rind
1-2 drops orange food colouring
chocolate fudge sauce
1/3 cup (80ml) single (pouring) cream
200g dark chocolate, chopped
1. Preheat oven to 160ºC (320ºF). Place the milk, sugar and vanilla in a bowl and whisk to combine. Add butter and whisk to combine.
2. Add flours and eggs and whisk until smooth.
3. Divide mixture into 2 bowls. Add the cocoa and chocolate to one and whilst until smooth. Add the orange rind and food colouring to the other and whisk until smooth.
4. Pour chocolate mixture into a well greased 8 cup-capacity (2 litre) Bundt tin. Drop spoonfuls of the orange mixture onto the chocolate and gently swirl with a butter knife to create a marble effect.
5. Bake for 1 hour 10 minutes or until cooked when tested with a skewer. Cool in tin for 10 minutes. Turn onto a wire rack t cool completely.
6. To make the chocolate fudge sauce, place the cream and chocolate in a saucepan over a low heat and cook, stirring, until melted and smooth. Pour over the cake to serve.
Serves 8-10.
 Voila! Bon Appétit!
Read More......
Hot Cross Buns
Comments (11) | Tuesday, April 7, 2009
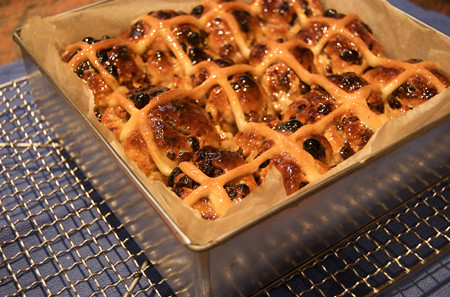
My first batch of hot cross buns ever...and they were a success!
I was going to do Nigella Lawson's recipe, but hers looked all flat and lifeless. And every other recipe I read, looked like way too much work! I was pretty sure Donna Hay had a recipe and I'm glad she did. Like most of her recipes, this one was easy.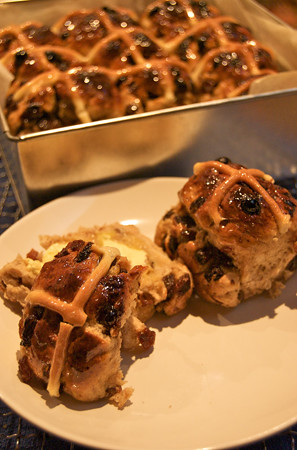
I feared they were going to be as hard as rocks but they weren't. They were surprisingly soft and delicious! The spices were right, the flavour was there, and I'm so glad they were a success. I might try choc chip ones next time!
Hot Cross Buns
Donna Hay, alterations by Iron Chef Shellie
2 tablespoons dried yeast*
¼ cup (55g) caster (superfine) sugar
1½ cups (375ml) warm milk
4¼ cups (635g) plain (all-purpose) flour
2 teaspoons mixed spice
2 teaspoons ground cinnamon
50g butter, melted
1 egg
¼ cup (55g) caster (superfine) sugar, extra
2½ cups mixed fruit
Crosses
½ cup (75g) plain (all-purpose) flour
⅓ cup (80ml) water
Glaze
2 teaspoons sugar
1 teaspoon powdered gelatine
¼ cup (60ml) water
1. Combine the yeast, sugar and milk in a bowl. Set aside for 5-10 minutes or until bubbles form on the surface.
2. Combine the flour, mixed spice, cinnamon, butter, egg, extra sugar, sultanas, mixed peel and yeast mixture in a large bowl. Mix with a butter knife until a sticky dough forms. Knead on a lightly floured surface for 5–10 minutes or until it feels smooth and elastic when pressed. Place in an oiled bowl, cover with a tea towel and stand in a warm place for 30–40 minutes or until doubled in size.
3. Lightly knead the dough again, divide into 12 pieces and roll into balls. Place in a 23cm-square cake tin lined with non-stick baking paper. Cover with a clean tea towel and set aside in a warm place for 25–30 minutes or until doubled in size.
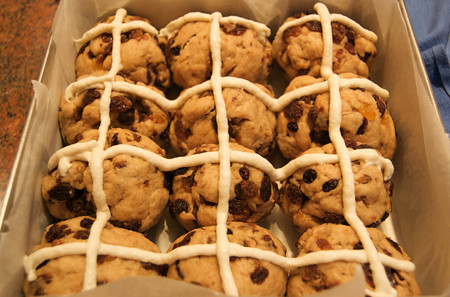
5. To make the glaze, combine the sugar, gelatine and water in a saucepan over medium heat and stir for 2 minutes or until dissolved. Brush warm buns with the glaze and serve with butter.
* You will need this amount of yeast because of the amount of sugar in the recipe.
** To make a piping bag, fill a ziplock bag with the cross mixture and snip off one corner.
Makes 12.
 Voila! Bon Appétit!
Read More......
Eggplant and Beef Bolognese
Comments (0) | Thursday, April 2, 2009
I LOVE my pasta. Hence why my waistline isn't what I'd like it to be, but as my aunty once said "I'm here for a good time, not a long time", so I'll enjoy my pasta and then go work some of it off at the gym.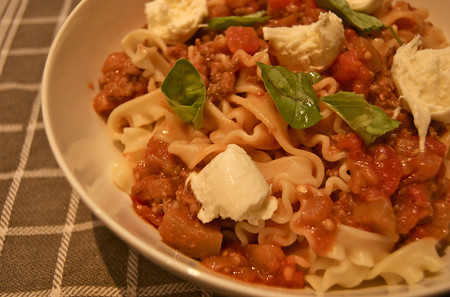
I haven't used eggplant before believe it or not! Was never really a fan, but since starting cooking, I've been eager to try new flavours and all the things I've been missing out on!
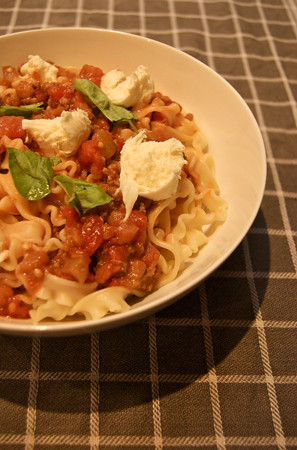
I couldn't find any pappardelle pasta, so I settled on curly fettuccine. It almost looks like squid instead of pasta!
So I peeled the eggplant and was starting to chop it up when my dad comes over and goes "What's THAT?!" I couldn't help but laugh because I also thought it looked weird when it was naked, almost like a melon or something!
The sauce didn't taste all that fantastic, so I seasoned it with salt, pepper and sugar. It was still a bit runny and didn't look that great to I added in a tub of tomato paste and BAM! It looked much better and tasted amazing!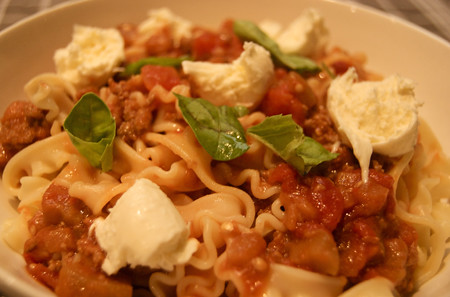
Eggplant and Beef Bolognese
Donna Hay with alterations by Iron Chef Shellie
400g pappardelle pasta, or fettuccine
2 tablespoons olive oil
1 eggplant, chopped
2 cloves garlic, crushed
500g beef mince
2 x 400g cans chopped tomatoes
1 tub tomato paste
1/2 cup basil leaves
240g bocconcini, torn
1. Cook the pasta as per instructions on the packet. Drain and keep warm.
2. Heat the oil in a large frying pan over high heat. Add the eggplant and garlic and cook for 2-3 minutes or until golden.
3. Add the beef and cook, breaking up any lumps with a wooden spoon, for 5 minutes or until browned. Add the tomato and cook for 5 minutes or until thickened. Add 1 tub of tomato paste and stir through.
4. Add the pasta and toss to combine. Top with basil and bocconcini to serve.
Serves 4.
 Voila! Bon Appétit!
Read More......
Pistachio & Lemon Bites
Comments (4) | Friday, March 13, 2009
I made these for a random casual dinner party last night. A lovely bunch of people gathered at Iron Chef Jason's house for a lovely dinner of pasta and Bondi Vet.
Whilst I'm sorry that the gluten free and vegan guests couldn't try these, they were a bit hit with everyone else.
It was a bit pain staking shelling 150 grams of pistachio nuts. So I shelled a few more grams to reward myself for the hard work.
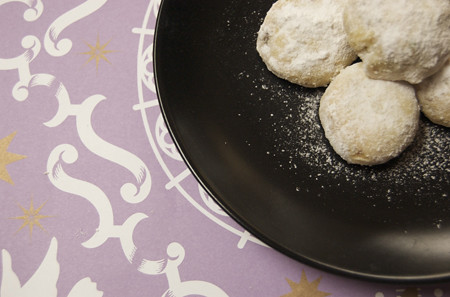
Whilst the biscuit itself isn't very sweet, it's the icing sugar that brings the main sweetness to it. So make sure you smother it in icing sugar. The recipe says to "dust" with the icing sugar, but you actually need to rub the icing sugar all over the biscuit and then dust.
The lemon rind makes it a little bit refreshing too. You can easily eat more than one in a sitting! Perfect with a cup of my favorite, Earl Grey tea.
Pistachio & Lemon Bites
Donna Hay
300g butter, softened
3 tablespoon caster sugar
150g pistachio nuts, roughly chopped
2 1/2 cups plain flour, sifted
1 tablespoon lemon rind
icing sugar for dusting
1. Preheat the oven to 180°C. Place the butter and sugar in the bowl of an electric mixer and beat for 4 minutes or until light and creamy.
2. Add the pistachios and beat for 2 minutes. Fold through the flour and lemon rind and mix until will combined.
3. Roll tablespoonfuls of the mixture into balls, place on a baking tray lined with baking paper, flatten slightly and bake for 15-20 minutes. Cool on a wire rack and dust with icing sugar.
Makes 30.


 Voila! Bon Appétit!
Read More......
Fig & Oat Biscuits
Comments (1) | Tuesday, March 10, 2009
We had a few too many figs lying around the house this weekend and mum said if I wanted to use them I had better do it quick or they wouldn't be good anymore. Talk about baking under pressure!
They are as delicious as they look! I would say it's the little bit of cinnamon that really makes these biscuits special.
I would suggest you give these a whirl if you have some spare figs. Perfect with a cuppa tea.
Fig & Oat Biscuits
Donna Hay
3/4 cup brown sugar
125g butter, softened
1 egg
1 cup plain flour
1/4 teaspoon bicarbonate of soda (baking soda)
1 cup rolled oats
3/4 cup chopped dried figs
1/2 teaspoon cinnamon
3 large figs, thinly sliced
1. Preheat the oven to 180°C. Place the sugar and butter in the bowl of an electric mixer and beat until light and creamy. Add the egg and beat well.
2. Sift the flour and bicarbonate of soda over the butter mixture and fold in with the oats, dried figs and cinnamon.
3. Roll tablespoons of the mixture into balls and shape into 7cm rounds. Place on baking trays lined with non-stick baking paper and top with sliced figs. Bake for 20 minutes or until golden. Cool on wire racks.
Makes 15.


Voila! Bon Appétit!
Read More......
Chocolate Madeleines
Comments (2) | Friday, March 6, 2009
I thought I'd bake a little thank you gift for my panel beater to thank him for all the help he has provided with my car lately. I did have a pistachio and lemon biscuit in mind but when I went to the cupboard I found that my bag of pistachios had been eaten. So instead I went for something much easier and went for chocolate madeleines.
Chocolate Madeleines
Donna Hay
2 eggs
1/3 cup caster sugar
1/3 cup plain flour
1 teaspoon baking powder
2 tablespoons cocoa powder
60g butter, melted
1. Preheat the oven to 180°C. Place the eggs and sugar in a bowl and whisk to combine. Sift the flour, baking powder and cocoa over the egg mixture and fold through with melted butter.
2. Spoon the mixture into greased large madeleine tins until two-thirds full.
3. Bake for 10 minutes or until the madeleines are set.
Makes 12.
Voila! Bon Appétit!
Read More......
Chocolate Candy Cane Cookies
Comments (3) | Monday, March 2, 2009
I am currently walking around like a pregnant duck! And I am neither pregnant nor a duck.
I suppose you want to know why? I did too much exercise this weekend! 1 hour of personal training, then a nice long bike ride the day after. Too many walking lunges and squats has left me unable to walk properly... or do anything else without looking like a total idiot!
So I didn't go to the gym tonight, instead I baked some cookies! I'm sure my personal trainer would understand, who can resist chocolate after all? And it gives me a chance to use up some candy canes I've had lying around since Christmas.
They are awesome! I knew they would be as I put them in the oven. The scent of minty candy canes with lots and lots of chocolate....mmmmmm. Eat them when they are warm and the chocolate is still melting.
Chocolate Candy Cane Cookies
Donna Hay
110g butter, softened and chopped
1 cup (175g) brown sugar
1 egg
1 teaspoon vanilla extract
1 cup (150g) plain flour, sifted
1/4 cup (25g) cocoa, sifted
1/2 teaspoon bicarbonate of (baking) soda
120g dark chocolate, melted
280g dark chocolate, extra, chopped
120g candy canes, chopped
1. Preheat oven to 160°C. Place the butter and sugar in the bowl of an electric mixer and beat for 8-10 minutes or until light and creamy.
2. Add the egg and vanilla and beat until well combined. Add the flour, cocoa, bicarbonate of soda and melted chocolate and beat until just combined. Fold through the extra chopped chocolate.
3. Roll tablespoonfuls of the mixture into rounds. Place on baking trays lined with non-stick baking paper, allowing room for the cookies to spread, and flatten slightly. Press the chopped candy canes into the tops of the cookies and bake for 12-15 minutes or until the edges are firm. Allow to cool on the trays.
Makes 20.
Read More......
Easy Pho Recipe
Comments (2) | Saturday, February 7, 2009
Mid week cooking postings have been a bit rare as of late haven't they?
This week I attempted a very easy pho recipe from the new Donna Hay magazine.
I am a big fan of pho as you may remember from my previous pho adventures.
Most recipes I've seen have about 600 different ingredients to get the stock right, where as this one just uses beef stock and a few spices.
It was just way too easy to cook and to have dinner on the table in no time!
Donna Hay did get a few things wrong though in her recipe, in my opinion. She uses only 200 grams of rice stick noodles. The traditional noodle used is the flat rice noodles, and well 200g for 4 people would just be not enough! I used a 375g packet and it was enough for everyone.
She also uses regular basil, when in fact you need to use Thai Basil.
Beef Pho
Donna Hay with Iron Chef Shellie alterations.
375g flat rice noodles (similar to ones used in pad thai)
1.5 litres beef stock or consomme
1 star anise
1 cinnamon stick
1 cardamon pod
1 spring onion, cut into 0.5cm pieces (I like to cut mine using scissors)
200g eye fillet, cut paper thin (the best way to do this is to freeze, then cut with a very sharp blade)
1 cup bean sprouts
1 cup Thai bail
2 small red chillies, sliced
fish sauce lemon wedges, to serve
 I served mine like in the Vietnamese restaurants by letting everyone help themselves to bean sprouts, Thai basil and lemon.
2. Place the stock, cinnamon, star anise and cardamon in a saucepan over high heat and bring to the boil. Reduce the heat to low and cook for 5 minutes. Top the noodles with the spring onion, beef and pour over the stock. The stock will cook the raw eye fillet.

4. Top with the thai basil, bean sprouts and chilli.
5. Add fish sauce and lemon juice to taste.
Serves 4.

Read More......
Reindeer Cupcakes
Comments (3) | Saturday, December 20, 2008
I have just finished making the cutest Christmas cupcakes and wanted to share them immediately with you. You will have to excuse the not so creative photography as they are all packed up in my cupcake courier ready for transportation for a Christmas party.
They are taken from Donna Hay's latest magazine: Issue number 42. The recipe is on page 198. The cupcakes are vanilla with raspberries, topped with a chocolate butter frosting.
The nose is done using a Jaffa, and eyes are made from mini-m&m's. Whilst the antlers are made from halved preztels. I'm sure these are going to be a big hit, I'll be making another batch for my family on Christmas eve.
Enjoy!
 naked cupcakes before getting dressed as reindeers
 reindeer cupcakes... too cute to eat!
Read More......
Ricotta-Basil Chicken & Wilted Tomatoes
Comments (0) | Friday, December 19, 2008
Ok so I've had some of my favorite people nag me about not posting often enough! So here is another post to keep you all entertained for a while.
This recipe is from Donna Hay's new book, "No Time To Cook". I made it on a day when I literally had no time to cook, running from place to place, stuck in peak hour traffic, dramas, dramas, dramas!! I still had dinner on the table for the family and they were none the wiser.
For me, I wanted more flavour from this dish, perhaps more salt, or more basil. My boyfriend and mum raided the bunch of basil and covered their chicken with extra basil. Still a nice one to keep on file though.
Ricotta-Basil Chicken & Wilted Tomatoes
Donna Hay
100g fresh ricotta
1 tablespoon shredded basil
1 tablespoon finely grated parmesan
2 x 200g chicken breast fillets, skin on
sea salt and cracked black pepper
1 tablespoon olive oil
250g cherry tomatoes, halved
extra basil leaves, to serve
1. Preheat the oven to 160°C (320°F). Combine ricotta, shredded basil and parmesan. Carefully loosen the skin from the chicken breast, leaving the ends intact and carefully spoon in ricotta mixture.
2. Sprinkle chicken with salt and pepper. Heat a medium non-stick frying pan with an ovenproof handle over medium-high heat. Add oil and chicken to the pan and cook chicken for 2 minutes each side or until well browned. Add tomatoes, place the pan in the over and cook for 10 minutes or until the chicken is cooked through.
3. Divide between plates and top with extra basil.
Serves 2.
Read More......


